It is always a good idea to have a backup of your website, database and emails. If the worst happens you have something to revert to.
Note: We back up our servers every night, and we retain backups for seven days. If your website suddenly breaks or if you accidentally delete one or more emails, we can usually restore everything.
However, it is still a good idea to make the occasional backup of your account. If your website broke more than a week ago then it isn’t possible to simply “roll back” your website to a known good state. If you got an old backup then you can always use that backup to undo the damage.
The Backup Wizard
cPanel has two options for making and restoring backups: there is a Backup option as well as a Backup Wizard. The only difference between the two is the interface. The Backup option presents you with lots of options on a single screen, while the Backup Wizard goes through the process one step at the time. If you are new to making backups via cPanel then the latter options is easier.
The wizard has three steps. First, you need to choose whether you want to create or restore a backup. Let’s make a backup first:

Step 1: selecting the Back Up option.
By default the Wizard makes a backup of all the files in your home directory (in our case the entire /home/example directory); any existing databases as well as any email forwarders and filters. If you want you can make a backup of just one of these items. For our example I will create a backup of the home directory only.
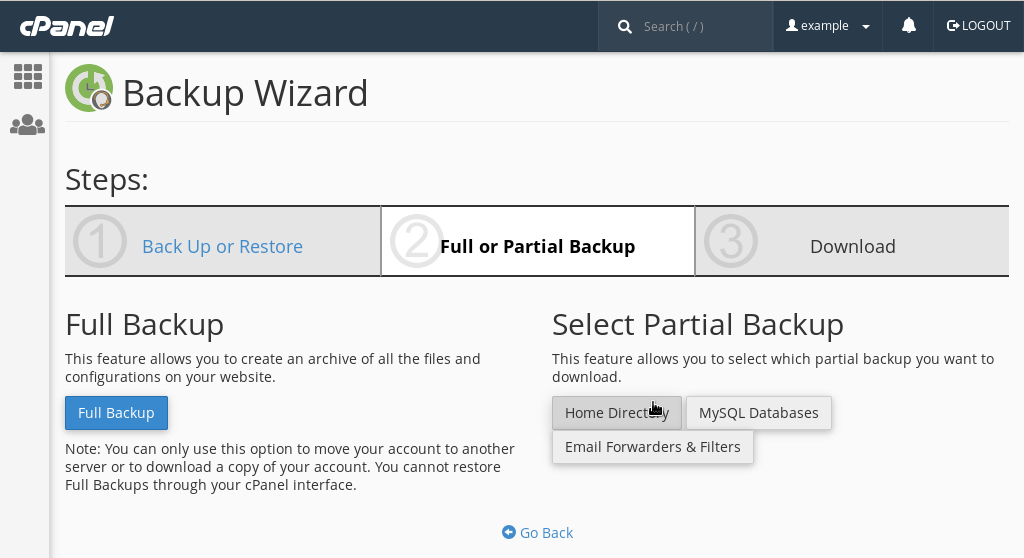
Step 2: selecting what we want to back up.
The final step is as easy as it gets: you just need to confirm that you want to download the backup. After clicking the confirmation button (here the Home Directory button) your browser will download a backup file to your local computer. The file is a tar.gz file, which is a compressed archive file (similar to a .zip file).
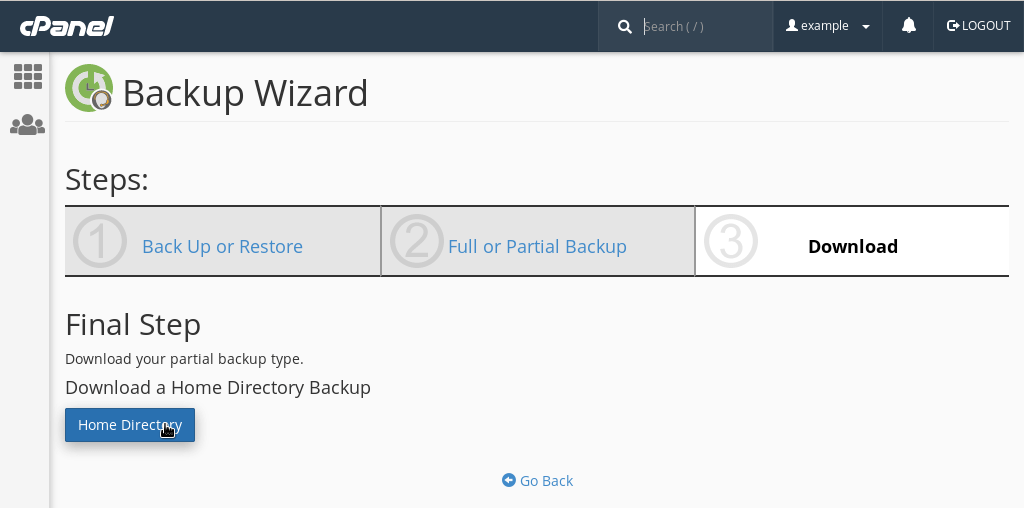
Step 3: Confirming our choices.
Note: It is important to keep your backup somewhere safe. The backup file is likely to contain login details and other personal data. You probably want to encrypt the file after downloaded it.
Restoring a backup
Restoring a backup is just as easy. At step 1 you select that you want to restore a backup; at step 2 you choose what you want to restore and at step 3 you select a backup file from your local machine.

Restoring a backup via the Wizard.
After that, the backup file is uploaded to the server, and a new browser tab or window will open to confirm what items have been restored.
Restores overwrite files (but does not delete any)
It might be obvious, but it is worth pointing out that restoring a backup overwrites files. Any changes you made since the backup was taken are lost.
Also, restoring a backup doesn’t delete files. This can be problematic. If you are restoring a backup because malicious scripts appeared on your site then those script won’t be removed. You could, however, delete all files in the public_html directory before restoring your backup. Of course, make sure that there aren’t any important files on the server that are not in your backup.
Many websites store website content in a database. In that case you can often restore just the website files, so that you don’t loose any content. Bear in mind, though, that if a website has been infected the database may have been compromised as well. If you are dealing with a website that has been hacked, please always contact us.