WordPress Toolkit is one of two commonly used tools to install and manage WordPress websites. Earlier this year we wrote a series of articles about managing WordPress websites via Softaculous. At the time, many WordPress Toolkit features were paid-for, which is why we suggested using Softaculous instead. Since cPanel version 100 the full-featured version (“DeLuxe”) is available for free, so it is time to revisit Toolkit.
This article gives a general overview of Toolkit. In the next articles I will look at how to use Toolkit.
- Installing and configuring WordPress via Toolkit
- Making and restoring backups using Toolkit
- Cloning and staging WordPress websites using Toolkit
- Hardening WordPress using Toolkit
What is Toolkit?
One of the first hurdles for people who are not web developers is getting started. Buying a hosting plan and domain name is easy enough, but that doesn’t give you a website. And, installing and configuring a content management system such as WordPress can be daunting. This is where Toolkit comes in. It aims to make installing and managing WordPress easy.
Toolkit has more features than the Softaculous WordPress manager, in particular when it comes to security. The Toolkit interface is also much cleaner. That is mainly because Toolkit has just one job: installing and managing WordPress instances. Softaculous is a more general software installer. It can also install and manage other software, such as Drupal.
If you are a WordPress developer, Toolkit uses WP-CLI for installing and managing WordPress (including plugins and themes). On top of that it integrates with various cPanel interfaces, such as cron jobs (to replace the WordPress cron) and the Multi-PHP Manager. Some of these Toolkit features are still a little buggy. For instance, trying to change the PHP version via Toolkit might open the CloudLinux PHP Selector rather than the MultiPHP Manager, and the “hotlink protection” switch didn’t work at all in our testing.
In addition, some of the security measures you can apply add directives to a custom Apache configuration file. So, even if you prefer the WP-CLI command line interface, there are features that are unique to Toolkit.
Getting started with Toolkit
When you first log into the cPanel control panel you are likely to be greeted by a welcome message. There are two links to get you started: “create an email account” and “build a website”.

Image: cPanel’s welcome page.
The “build a website” option takes you to the WordPress Toolkit interface. You can also get to Toolkit by searching for “toolkit” via cPanel’s search box. When you open Toolkit for the first time you have the option to install WordPress or to scan for existing WordPress instances. The latter option is useful if you have already installed WordPress and want to manage the instance via Toolkit.
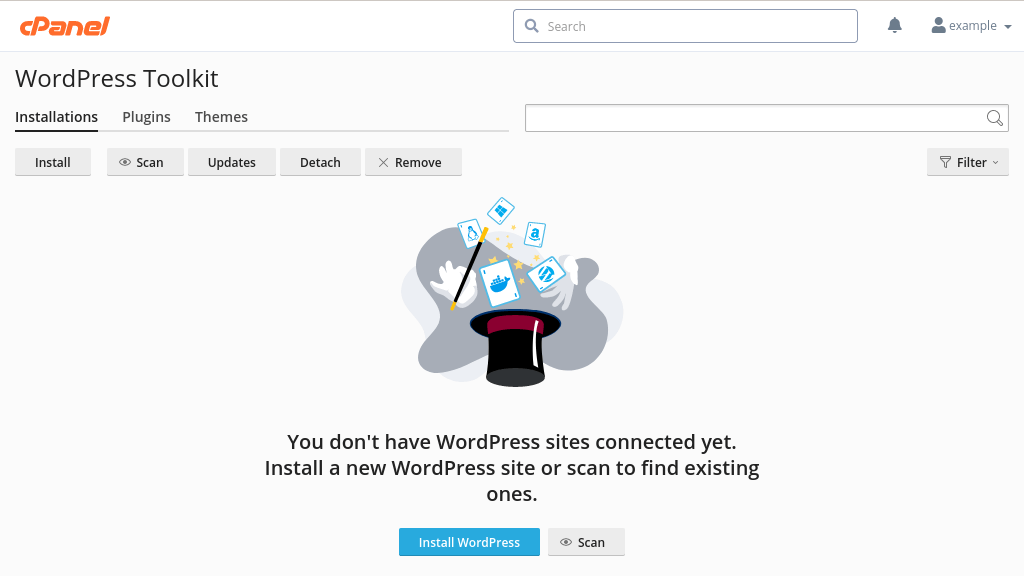
Image: Toolkit can install WordPress and scan for already installed WordPress instances.
The Toolkit interface
The main Toolkit page has three tabs: Installations, Plugins and Themes. The Installations tab lists all instances Toolkit is aware of. In the below image there is just one website: example.com.

Image: ToolKit now manages example.com.
The last two options under the Installations tab are Detach and Remove. The Detach option makes Toolkit forget about the website, while Remove deletes the website. Please be careful with the latter option. Toolkit will purge the WordPress instance, including the website files and database. There is no undo button (though we can restore the website from one of our backups).
The other two tabs can be used to manage the plugins and themes for one or more instances:
- Plugins lists all installed plugins, for any number of instances.
- Themes lists all installed themes, for any number of instances.
Each tab has specific options. For instance, on the Plugins tab you can activate, deactivate, install, uninstall or update plugins. If you got multiple WordPress websites then you can update all the plugins for all your websites with a few clicks.
Managing a single instance
You can expand and collapse the details for individual WordPress instances. When an instance is collapsed you only see the name of the website, whether or not there are any issues with the website and, to the right, a couple of shortcuts. The down arrow to the left of the website name lets you expand (and collapse) the instance card.
Refreshing Toolkit
One of the shortcuts is “Refresh”. This is an important option. When you make changes outside Toolkit you need to tell it about the changes. Toolkit does refresh WordPress instances once a day, but any changes made since will not have been picked up yet. For instance, any plugin or theme you install via the WordPress dashboard won’t show in Toolkit until the next refresh.
So, when you make changes you typically want to hit the “Refresh” button to update Toolkit. This process is a little slow, as there are lots of things Toolkit has to check. It can easily take 30 to 60 seconds.
Log in settings
When you expand the settings for an instance you see a thumbnail of the website in the left-hand pane, together with a Log in and Setup button. The “Log in” button opens the WordPress dashboard in a new browser tab. Or, to be precise, it does so if you installed WordPress via Toolkit. If you added an existing WordPress website to Toolkit then it won’t know the WordPress logins. In that case the “Log in” button takes you to the Setup page instead.

Image: the details for example.com.
The Setup page shows the WordPress login URL; the username and email address of the administrator; the password and the website language. There are two things worth noting about the page:
- If you use a plugin that changes the WordPress login page to something else than wp-login.php then you can enter the custom URL on this page. In general, changing the login page is good practice. It stops pretty much all brute-force login attempts. These attacks are very common, and changing the login URL is an easy way to stop them.
- If you install WordPress via Toolkit then the admin password is shown in clear text. Similarly, if you reset the password via Toolkit then the password is displayed on the page. The password is encrypted but visible to anyone who can login to your cPanel account.
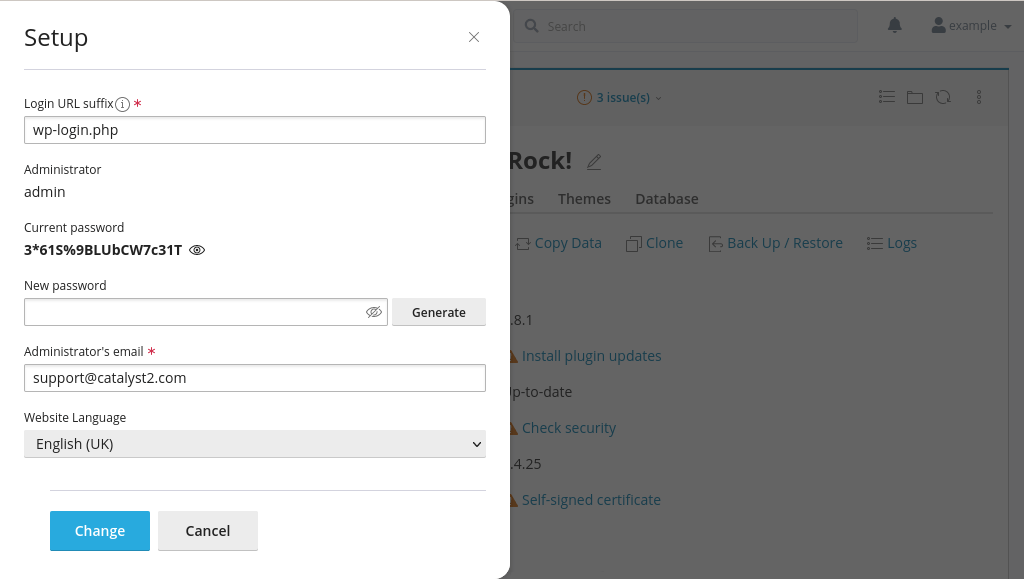
Image: the setup details, including my password.
The password issue
The latter is poor design and something to be aware of before you start using Toolkit. If you have a colleague or developer who has access to your cPanel account then the person can see your WordPress password as well. Or, if your cPanel account gets compromised then the attacker also has your WordPress password. Being able to log in to the WordPress dashboard via Toolkit is convenient, but it also opens a rather large security hole.
If you don’t like this feature but still want to use Toolkit then you can reset your WordPress password via the WordPress dashboard. WordPress uses password hashes, which means there is no way the password can be shown in plain text in the interface. You can also add an extra layer of security by installing a multi-factor authentication plugin.
Security status
The Status box shows whether or not WordPress is up to date, as well as the PHP version and whether or not the website has an SSL certificate. Any available updates can be installed with the click of a button.
If needed, you can change the PHP version for your domain via cPanel’s MultiPHP Manager. And, if your website doesn’t have an SSL certificate yet, we offer both business SSLs and free Let’s Encrypt certificates. Please contact us if you would like a Let’s Encrypt certificate.
The Status box covers just the basics. Toolkit can help you make your website more secure via the Check Security feature. I cover this in detail in the article about hardening WordPress using Toolkit.
Tools
The Tools section features five on/off switches for common tasks:
- Search engine indexing defines whether or not search engines such as Google are allowed to index your website. You also find this option in the WordPress dashboard, under Settings » Reading.
- Debugging adds or removes various
WP_DEBUGsettings in the wp-config.php file. - Password protection is the same as cPanel’s Directory Privacy feature. You can use the option to put your website behind a login prompt. This can be useful if you are working on a website that should not yet be visible to the public.
- Take over wp-cron.php replaces the WordPress cron with a real cron job. This is recommended. The WordPress cron runs on every page load, which often causes a lot of unnecessary resource usage. The replacement cron runs at set times (by default every 30 minutes).
- Enable hotlink protection is another option that exists in cPanel. The option stops other websites from serving resources such as images and videos from your server (which is known as “hotlinking”). In our testing this Toolkit feature doesn’t currently work. However, you can enable hotlink protection via cPanel.
Auto-update settings
There is one more feature I should mention in this introduction: auto-update settings. The Update Settings page lets you define if the WordPress core install, plugins and/or themes should automatically apply updates.

Image: the recommended auto-update settings for WordPress, plugins and themes.
It is a good idea to enable automatic updates. Most compromised WordPress websites we see were hacked because the install was out of date, and it is not always possible to clean up a hacked website. Your website is more secure if you let WordPress apply any available updates automatically.
That said, there is always a small risk that an update breaks your website. For instance, it may be that an update doesn’t work with a particular PHP version. We can usually quickly resolve such issues, but you may not instantly notice that your website is broken. Such events are rare and the benefits of automatic updates far outweigh the downsides. We therefore recommend to apply all available updates automatically.