cPanel’s Domains page is used to manage addon domains, subdomains and aliases. The interface has replaced the separate Addon Domains, Subdomains and Parked Domains sections.
Most users find the interface somewhat confusing, as it is not immediately clear what type of domains are listed on the page. In this article I first explain the difference between the type of domains, and I then explain how to create different types of domains.
The main domain
On a brand new cPanel account you should see just one domain. That domain is the “main”, or “primary” domain. This domain can’t be removed.
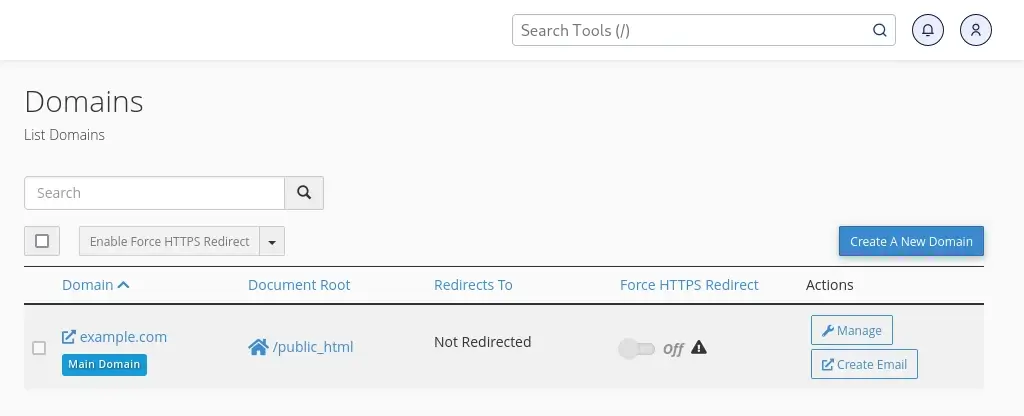
The Domain page on a newly created cPanel account.
Information on the Domains page
The table with information about domains has five columns:
- Domain shows the name of the domain. For the primary domain it also shows the label Main Domain. As we will see shortly, other types of domain don’t get a handy label like that.
- Document Root is the website directory for a domain. On cPanel servers, the default document root is public_html. This is where website files are kept.
- Redirects To shows whether or not the domain redirects to another domain.
- Force HTTPS Redirect can be used to redirect website traffic from HTTP to HTTPS.
- Actions provides quick links for specific tasks, such as creating an email address for a domain.
Next, let’s briefly look at how to create different types of domains.
Alias domains
An alias is a domain that shows the content of another domain. For instance, my main domain is example.com, and perhaps I also own the domain example.net. If I want example.net to show the same content as example.com then I can add it as an alias. This type of domain is also known as a “parked domain”.
Whether or not you can create an alias depends on your hosting plan. Most of our shared hosting plans don’t include aliases, but they can be added as an addon product.
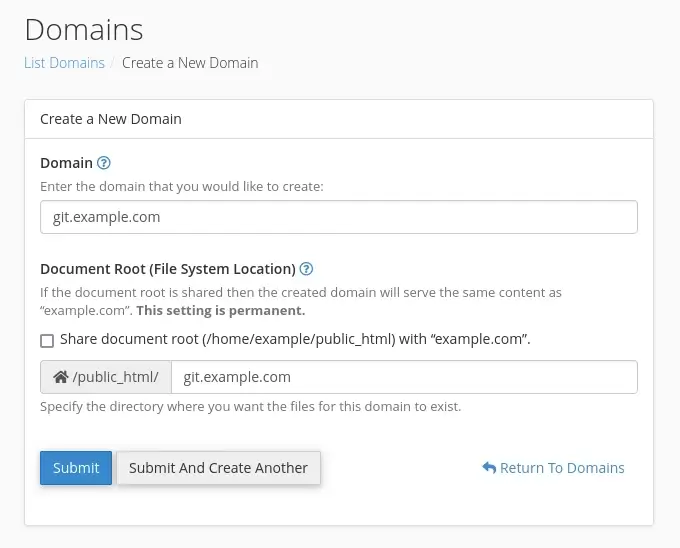
To add an alias domain, start by clicking the Create A New Domain button. You should then see this form:
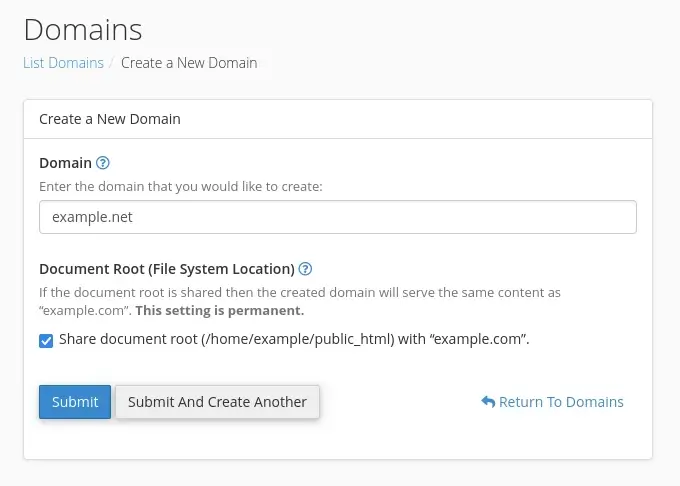
The Domain field is self-explanatory; this is where you enter the domain you want to add. The only thing to be aware of is that you should not enter the protocol (i.e. https://) and the www subdomain.
Next up is the Document Root field. This is a common source of confusion. By default, the Share document root checkbox is ticked. With that option, the new domain uses the same website directory as the main domain. In other words, the main domain and the new domain would show the same content. So, with the box checked cPanel creates an alias, which is the option we want.
Aliases on the Domains page
After adding the domain you are returned to the main Domains page, which now shows two domains:
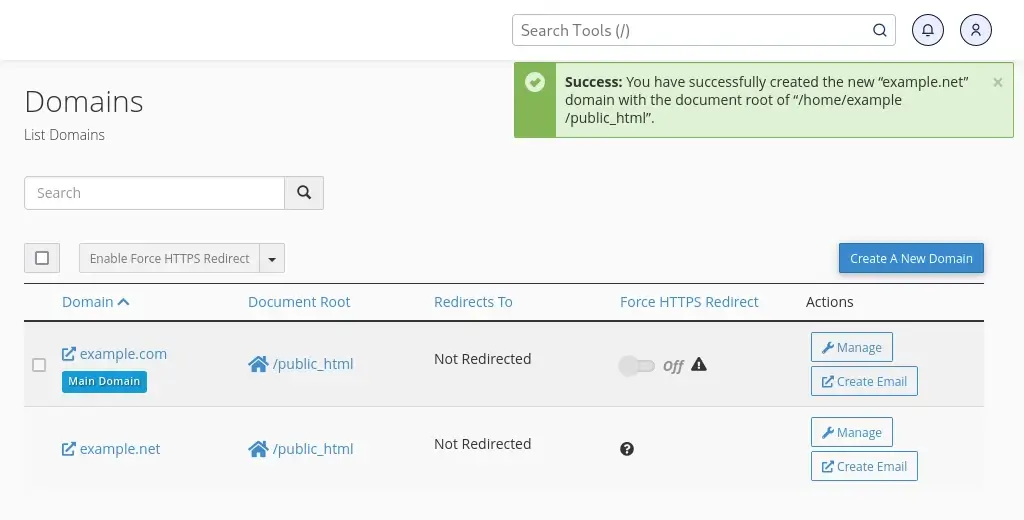
The main thing to note is that example.com and example.net share the same document root. So, they are one and the same website, but they use different domains. And we also know that example.com is the main domain. That tells us that example.net is an alias of example.com (and not the other way round).
When you create an alias you often also want to add a redirect, so that the alias redirects to the main domain. My article about aliases in cPanel talks about that in more detail.
Addon domain
Next, let’s add an addon domain. You use this option if you to want to manage multiple domains via you cPanel account. Whether or not you can host multiple domains again depends on the hosting plan. For instance, our “Power” plan allows one additional domain, while the “Power Extra” plan lets you host up to 10 domains. You can compare the hosting plans on our Web Hosting page.
To create an addon domain you enter the domain and untick the Share document root option. That is because the addon domain should be independent from the main website. It therefore needs its own document root.
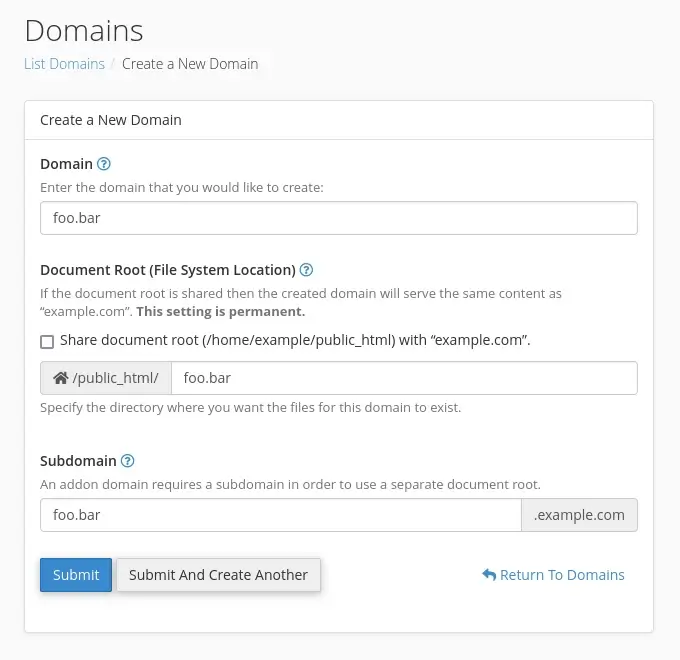
When you untick the box the form asks you what subdomain should be created. This is another source of confusion. You are creating an addon domain, so why would you want a subdomain? The reason has to do with the odd way in which cPanel creates addon domains. In the background, it creates a subdomain and it then adds an alias.
To illustrate, the above image shows that I am adding foo.bar as an addon domain. When I unticked Share document root, cPanel automatically offered to create the subdomain foo.bar.example.com. When I click Submit cPanel quietly creates the alias foo.bar for the domain foo.bar.example.com.
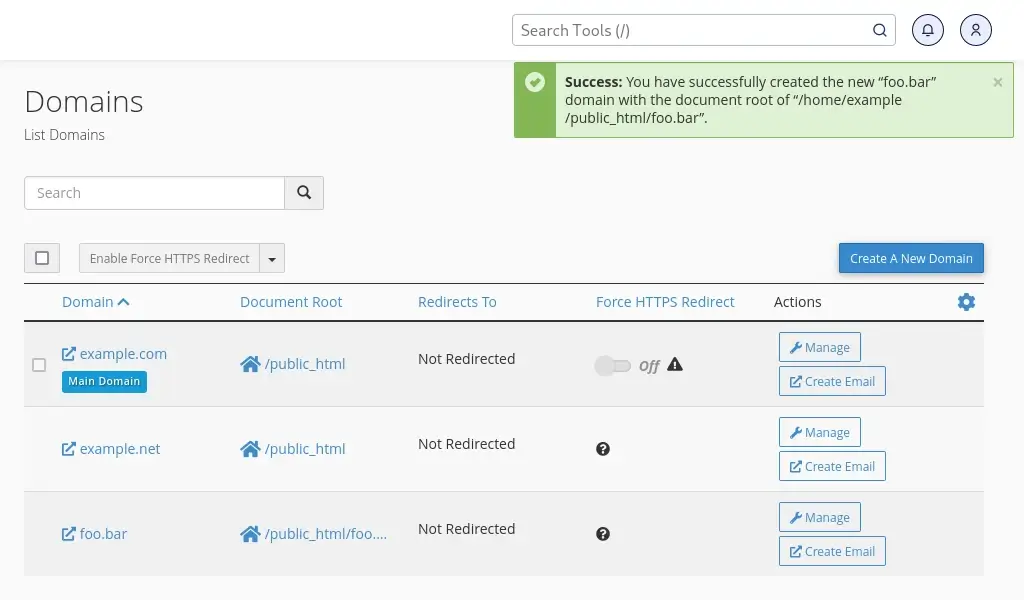
Addon domains on the Domains page
The Domain page doesn’t list the subdomain and alias. Instead, it simply lists the addon domain. You can tell it is an addon domain because the domain foo.bar has its own document root (public_html/foo.bar).
Subdomains
A subdomain is an independent section of a domain. For instance, you want to host a git repository for your domain then you can create a subdomain such as git.example.com.
Like addon domains, subdomains have their own document root. When you create a subdomain the Share document root is therefore automatically unticked. Cpanel also automatically suggests a location for the document root.
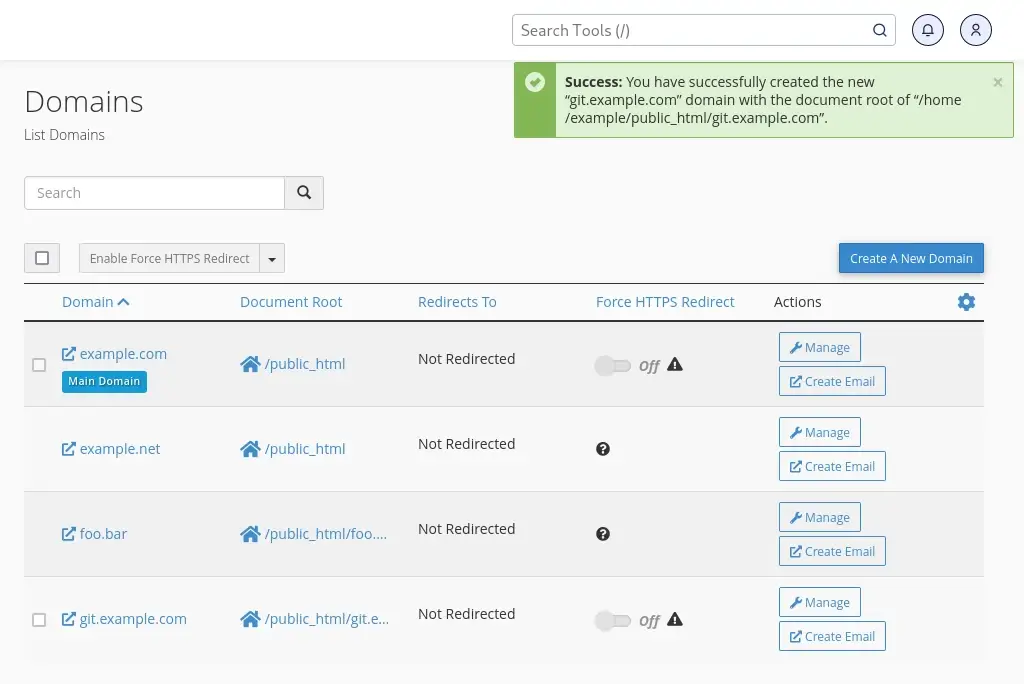
And there we have it: the subdomain has been created:
How to recognise types of domains
As mentioned, the Domains page doesn’t show if a domain is an addon domain, alias or subdomain. However, you can tell what types of domains are listed on the page by looking at the document root and the domain name itself:
- The primary domain is easy to spot, as it has the label “Main Domain”. It also always uses public_html as the document root.
- Aliases always share the document root with the main domain. The document root of example.net is public_html, and it therefore can only be an alias.
- Addon domains always have their own document root (because they are independent from the main domain).
- Subdomains are an independent section of the main domain, so you can recognise a subdomain by looking at the name itself. Like addon domains, a subdomain always has its own document root.