Thunderbird is an open source email client made by Mozilla (who also make the Firefox browser). It is available for Windows, OS X and Linux. This article explains how to configure an email account in Thunderbird and how you can archive email locally.
The wizard
When you first launch Thunderbird you will be greeted by a set-up wizard, which will guide you through setting up an email account. You can also configure an email account via the Accounts menu. We will show you both ways by setting up two email accounts.
For the wizard set-up we will use the email address info@example.net, which lives on our Strawberry server. On the first screen you need to enter three bits of information:
- Your name as it appears to others (when they receive an email from you).
- The email address you want to configure.
- The passwords for the email address.

Image: Thunderbird’s account set-up wizard.
You almost certainly want to keep the Remember password checkbox ticked (unless you like the idea of entering your email password every time Thunderbirds connects to the mail server).
Manual config
After you click on Continue Thunderbird will try to find the configuration settings for the domain. Unfortunately, it will come up with the wrong results. You therefore need to manually enter the settings, which you can by clicking on the Manual config button.
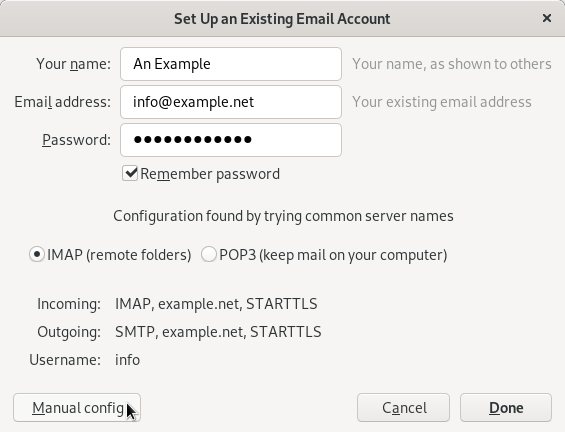
Image: Thunderbird’s incorrect guess at what the email settings should be.
After clicking the Manual config button you can manually enter the incoming and outgoing server names and the username.
Incoming server settings
For the incoming server we recommend using IMAP but you can use POP3 if you prefer. The server hostname should be the hostname of the server, which in our case is strawberry.active-ns.com. If you are not sure what hostname you should use, you can find this information via the Connect Devices option in cPanel.
If you are using IMAP then the port number should be 993. Use port 995 instead if you want to use POP3. In both cases Thunderbird will automatically set the type of security used to SSL/TLS. You can leave the authentication setting set to Autodetect.
Outgoing server settings
The outgoing (SMTP) server should also use the server’s hostname, and the port number should be 465. Again, the type of encryption is SSL/TLS and the authentication method can be set to Autodetect.
Username
On the last line you need to enter the username you use to connect to the mail server. By default, Thunderbird will use the username without the domain part (i.e. it will suggest using info rather than info@example.net). You need to make sure that the username is your full email address.

Image: entering the incoming and outgoing server settings and the username.
When you have entered the settings you can click the Re-test button. Thunderbird will check if the settings work, and if so you can next hit the Done button.
And that should be it! You should now see your email account.
Adding a second email account
You can add a second email account by clicking on the hamburger menu in the top-right corner and selecting Preferences > Account Settings. At the bottom of the left-hand pane you can click on Account Actions and then select Add Mail Account.
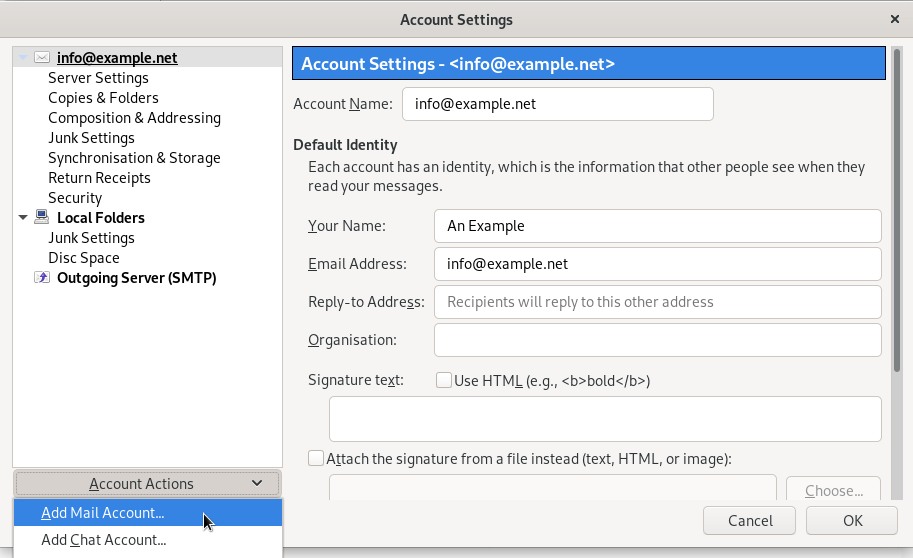
Image: adding a new email account via Thunderbird’s Account Settings.
You should now see the account set-up wizard again. After adding the second email account both accounts will show in your Thunderbird.
Archiving emails
In the below screenshot you can see the two email accounts we configured. We have selected the inbox for info@example.net, and below that you can see the nospam@example.net mailbox (which is collapsed).
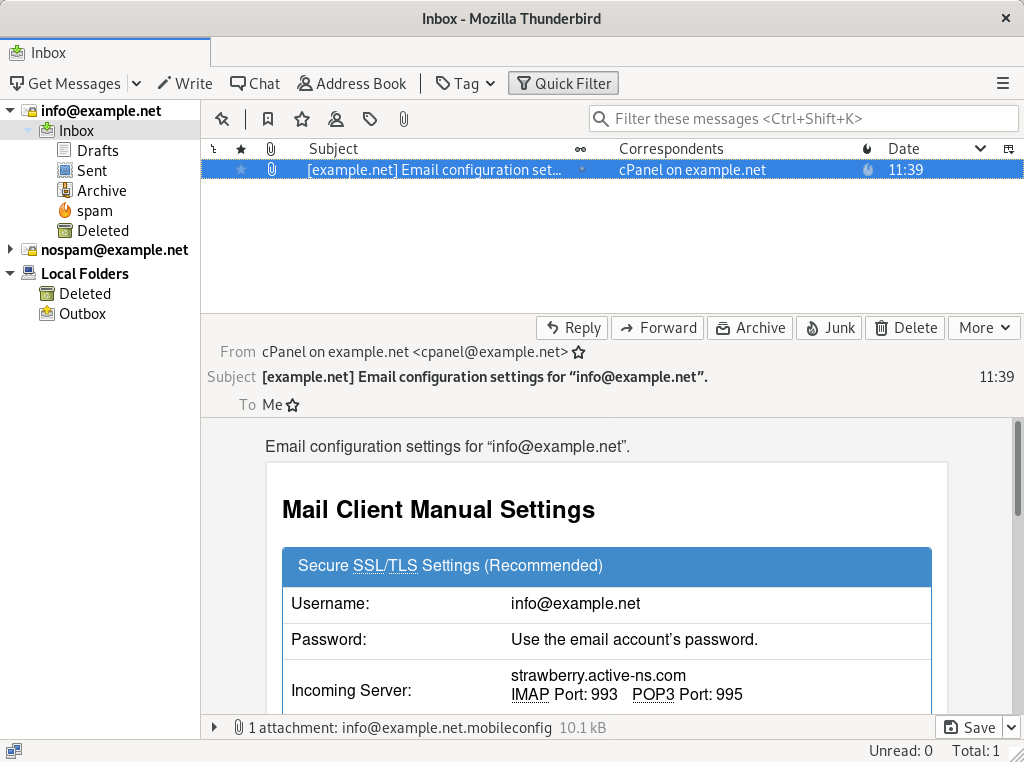
Image: two email accounts in Thunderbird.
There is a third folder in the left-hand pane as well: Local Folders. This is a special folder used for archiving emails. Any emails stored under Local Folders are no longer on the server, but they are still available locally, via Thunderbird. You can view emails in the folder as per usual, but the emails are only accessible in Thunderbird (and not on, say, a mail app on a smartphone).
Thunderbird’s default way of archiving emails is a little odd. By default Thunderbird stores emails you archive in a folder named Archives. That folder lives in your inbox, which defeats the purpose of archiving emails if you want to reduce the amount space used by your email account, as the emails will still be stored on the server.
You can correct the default settings as follows:
- In the left-hand pane, right-click on the email address and select Settings.
- Select the Copies & Folders option.
- Under Message Archives, select Local Folders from the Archives Folder on drop-down list.
When you now archive an email it will be stored in an Archives folder under Local Folders.
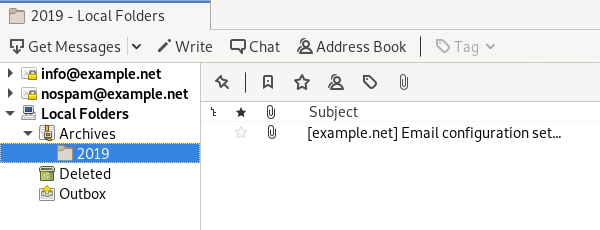
Image: the Archives folder now lives under Local Folders.
Manually archiving emails
Thunderbird’s archive folders organise email by year. For instance, as you can see in the above screenshot, the single email we archived is stored in a subfolder named 2019. Many people prefer a more custom way of organising archived emails. Doing so is fairly straight forward: you create custom folders under Local Folders.
In the below screenshot I have created a folder for the info@ and nospam@ mailboxes under Local Folders. Each folder has a number of subfolders. For instance, the Info folder has two subfolders: Chess and Work. You can create custom folders by simply right-clicking on Local Folders and selecting New Folder.

Image: custom folders under Local Folders.
The advantage of this approach is that you can archive emails to specific folders. All work-related emails can go to the Work folder, while chess-related emails are kept in the Chess folder. There is a downside to this approach though: you will need to manually archive your emails. Luckily, that is straight forward enough:
- Select the email(s) you want to archive.
- Drag them to the correct archive folder.
Alternatively, you can do the following:
- Select the email(s) you want to archive.
- Right-click and select Move To. You can use this menu option to navigate to the correct archive folder.
Where to go from here?
Thunderbird is a full-featured email client, and it is beyond the scope of this knowledgebase article to fully document the application. A good starting point for learning more about Thunderbird are the project’s support pages.