An auto-responder sends a reply message in response to incoming emails. They are often used to send out-of-office replies.
The interface
The Auto-responders interface has two sections:
- At the top of the page you can create an auto-responder.
- Any existing auto-responders are listed at the bottom of the page.
How to create an auto-responder
Clicking the Add Auto-responder button opens a new page where you can create your auto-responder. The form is quite long and the choices are not always obvious. As an example I will create an auto-responder for foo@example.net.
Character set
By default, auto-responders use the UTF-8 character set. This is a sensible default and it is unlikely that you need to use one of the other available encoding standards.
Interval
If you have used auto-responders before then you may have encountered the email ping pong phenomena. This happens when two auto-responders keep sending emails to each other.
For instance, you get an automated response when you send an email to support@catalyst2.com (the message lets you know that your email has been received and gives you a ticket number). If you have an auto-responder in place then our auto-response message will get an immediately reply from your auto-responder. Our auto-responder could in turn send its auto-respond message again, and so forth. Without a mechanism to break the loop this continues until one of the mailboxes reaches its quota and stops working.
This is where the interval comes in. It defines the interval at which your mailbox should reply with the auto-responder. An interval of 24 hours is a good choice.

Image: the ‘Character Set’ and ‘Interval’ fields.
Email and Domain
The email address and domain fields define the email address for the auto-responder. If you have more than one domain in your cPanel account then you can select any of your domains from a drop-down list.
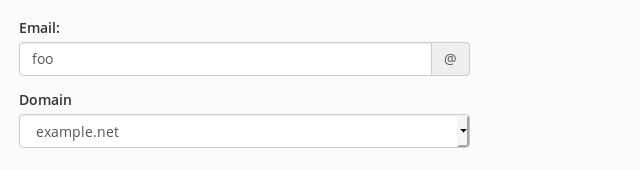
Image: the ‘Email’ and ‘Domain’ fields.
It is worth noting that the email address does not have to exist. For instance, it is possible to have an auto-responder for the non-existing email address foo@example.net. This option is useful if you have closed an email account. You can simply delete the mailbox and create an auto-responder that lets senders know that the email address no longer exists (which is more friendly than a generic “No such user” bounce email).
A limitation of cPanel’s auto-responders is that it is not possible to create a single auto-responder for all email addresses under a specific domain. In other words, auto-responders are always linked to a single email address.
From
The From field is typically used to enter your name, which is then displayed to the recipient of the auto-reply email. If you don’t want to enter your name then you can simply enter the email address.
Subject
The Subject field defines the subject of the auto-respond email. It is best practice to use the %subject% place-holder. This option keeps the subject of the original email, which is helpful to the sender. You can use a custom subject instead, but the sender may not notice that the auto-respond message is in reply to a particular email.
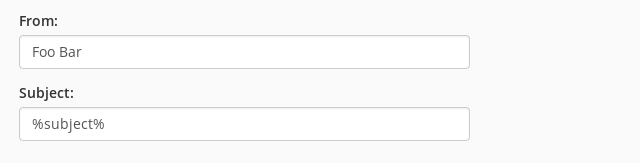
Image: the ‘From’ and ‘Subject’ fields. Use the %subject% tag to keep the original subject.
Body
The body is the actual response message. If you want you can use HTML but you need to make sure to tick the This message contains HTML checkbox.

Image: the ‘Body’ field. Here, our email simply says “I’m out!”. You probably want to enter a more informative message.
Start and Stop
Finally, the Start and Stop fields define from which date the auto-responder should start and stop. By default, auto-responders are effective straight away and never stop.
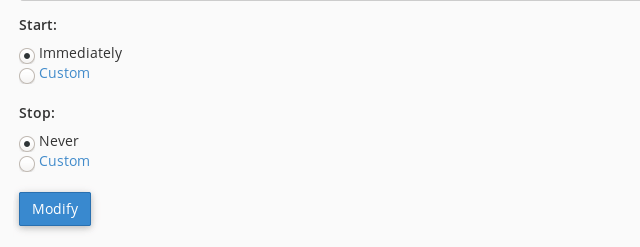
Image: the ‘Start’ and ‘Stop fields. By default auto-responders are effective immediately and never end.
To set a custom start and/or end date you can select the custom option. This displays a calendar from which you can select a date and time.
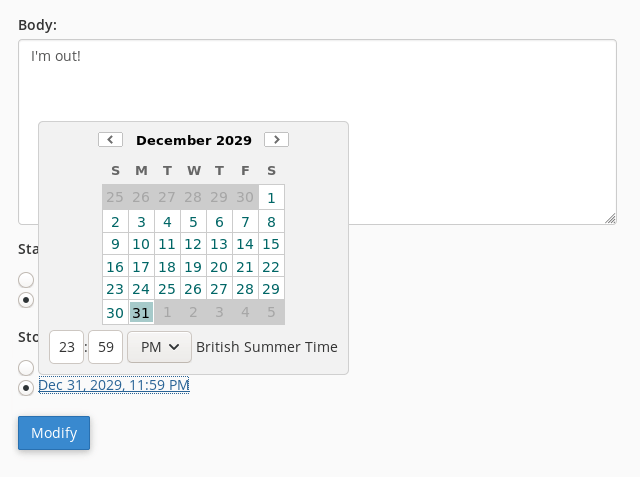
Image: picking an end date from a calendar. We shall be out of the office until 31 December 2029!
Managing existing auto-responders
Any existing auto-responders are listed on the main Auto-responders page. The table includes the email address and subject for each auto-responder, as well as links to edit or delete the auto-responder.
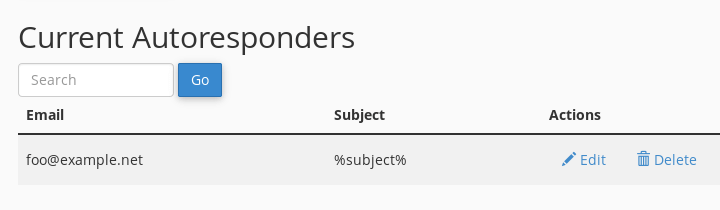
Image: our current auto-responders.