phpMyAdmin is an open source tool that lets you work with databases via your web browser. The software is not developed by cPanel but included on every cPanel server as it is a really useful tool.
To properly describe what you can do with phpMyAdmin would require an entire knowledgebase devoted to the software. I will instead look at the basics and try to give you an idea why learning more about phpMyAdmin might be a good investment of your time. The official documentation can be found on the phpMyAdmin website.
The interface
When you open phpMyAdmin you see your databases listed in the left-hand pane, and along the top of the screen you see a navigation bar with items such as Databases and SQL.

Image: phpMyAdmin’s interface.
In the above image you can see three databases: example_recipies, example_wp630 and information_schema. The latter databases is used by MySQL/MariaDB to store metadata and can be ignored.
Viewing tables and rows
When you select a database in the left-hand pane the options shown in the main navigation bar change. The first item listed in the navigation is Structure. The Structure tab lists all the tables in the selected database and provides various bits of information about each table.
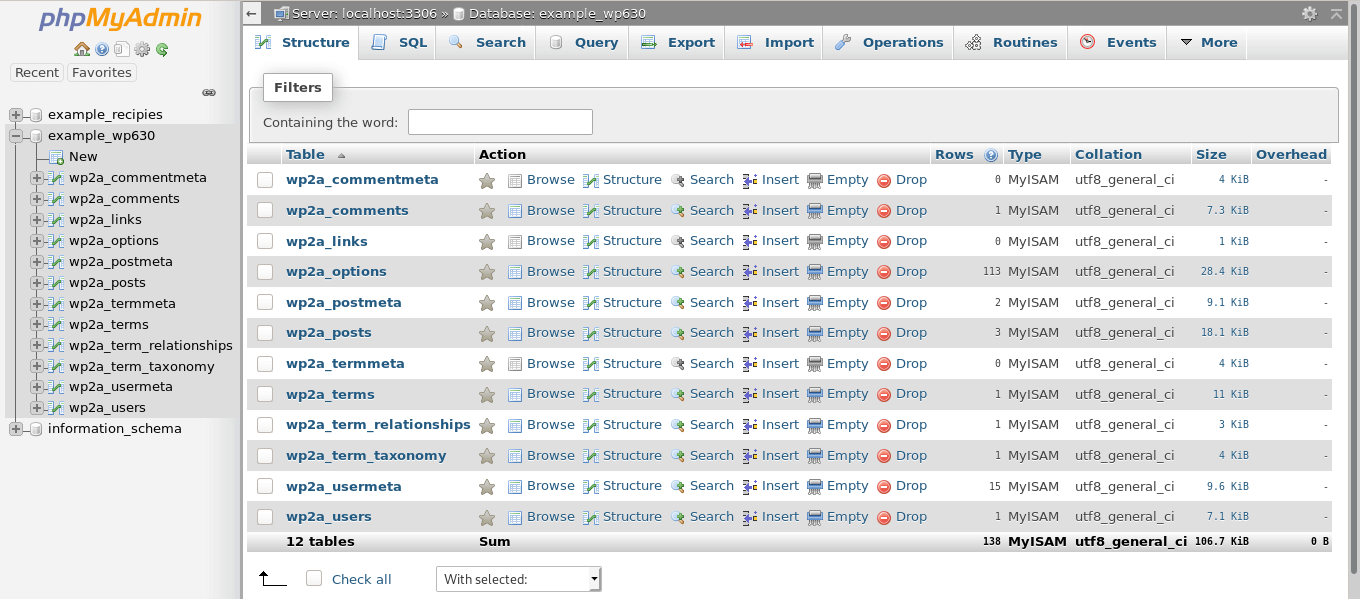
Image: Viewing all tables in the example_wp630 database.
Among others, you can see the number of rows in each table, as well as the table’s size. If your database has become rather large then you can use this view to quickly find the largest tables.
You can select a table by clicking on its name. Doing so opens the Browse tab, which shows all the fields in the table. In the below screenshot I selected the wp2a_users table, which contains just one row.

Image: Viewing all fields in the wp2a_users table.
It is worth noting that the SQL query that was run to retrieve the data is shown just below the navigation bar. To list all the rows in the wp2a_options table phpMyAdmin ran the command SELECT * FROM wp2a_options.
Viewing a table’s structure
When you select the Structure tab (after you have selected a table) you can view and alter the structure of a table. For each field in the table you see the type of column (such as BIGINT or VARCHAR) as well as buttons for actions you can take – including an option to delete a column. You can also add a new column: below the list with fields is an Add section.
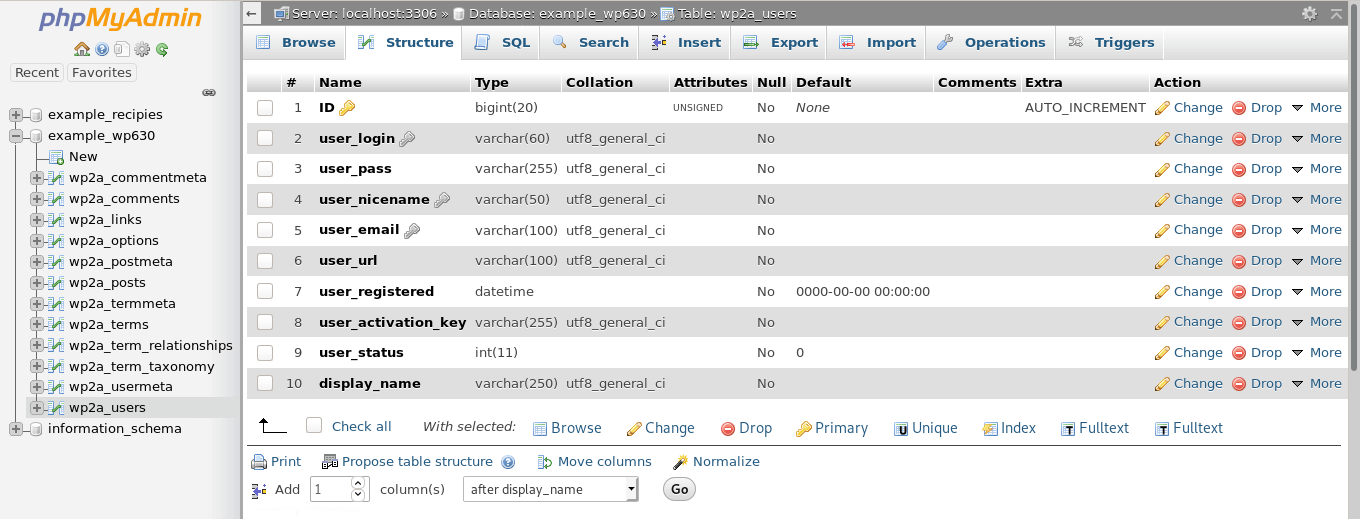
Image: Viewing the structure of the users table.
Entering raw SQL
The SQL tab lets you enter SQL commands. On cPanel servers this is mainly useful to select, insert, update or delete data. You can not use the SQL tab to manage the database and database users (you will get a “access denied” error). To manage databases and database users you need to use cPanel’s MySQL Databases page instead.
When you manually enter an SQL query phpMyAdmin highlights any syntax errors. In the below example I tried to select specific fields from the wp2a_options table but phpMyAdmin is seeing an error at line 4:
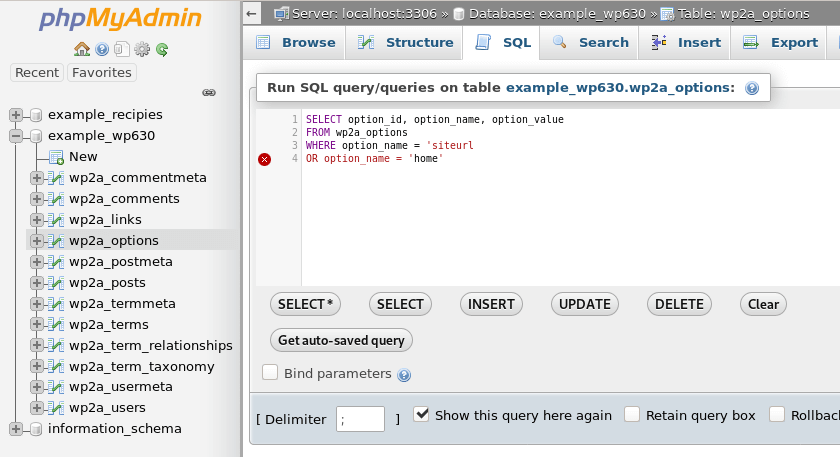
Image: phpMyAdmin’s syntax checker in action.
The error is actually on line 3: I forgot the end-quote after the word siteurl. The syntax highlighting helps you find exactly where the error starts. In the above example, the OR condition should have been printed in purple but it is instead printed in red. That points to the end of line 3, where the string siteurl was printed in the same colour.
After correcting the error the query returns the information:
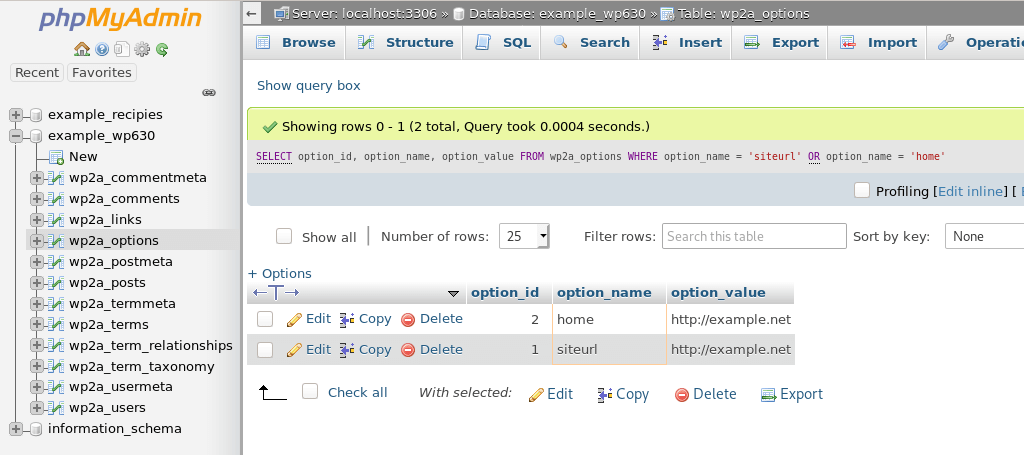
Image: Retrieving data via a custom SQL query.
Exporting and importing
The Export and Import tabs are visible both when you select a database and when you select a table. You probably don’t want to export or import an entire database via phpMyAdmin. cPanel’s Backup feature has a much cleaner interface and works faster.
That said, exporting a database (or table) is easy enough:
- Select the database or table you want to export
- Select the Export tab
- Click on Go to start the export
One interesting option is that you can choose the output format. By default you will get an SQL dump file (which you can also use to import the data). However, other formats are available, include CSV, JSON and YAML.

Image: Exporting the wp2a_posts table to an SQL file.
Importing a database or table is also easy:
- Select the database or table you want to import
- Click the Browse button to select the import file
- Click on Go to start the import
One thing to be aware of is that the import file can’t be larger than 50MB. If you got a large .sql file then you can zip the file – phpMyAdmin happily accepts files with a .sql.zip extension.
Searching tables
Finally, the Search tab lets you search for data in either a database or a table. If you have selected a table in the left-hand pane then you can search for a value in a field. In the below example I am searching for items in the wp2a_posts table that were published before the 1st January 2019 and which have the status “draft”.
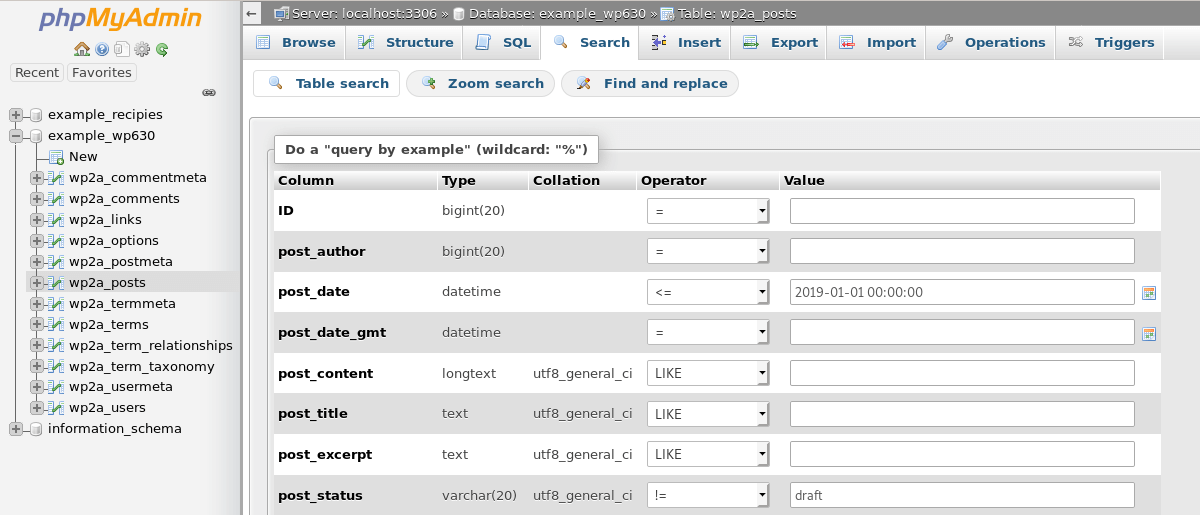
Image: Searching for specific rows in a table.
The search feature can be useful if you need to for instance change URLs from http:// to https://. You can see an example of how to do just that in the article with phpMyAdmin examples.