Setting up an email account on iPhones and iPads
This article explains how to set up an IMAP or POP account on iPhones and iPads.
Add the account
To start, open the Settings menu and tap Password & Accounts. You will be presented with a list of email providers, including iCloud and Exchange. To set up an IMAP or POP account you need to select Other and then Add Mail Account.
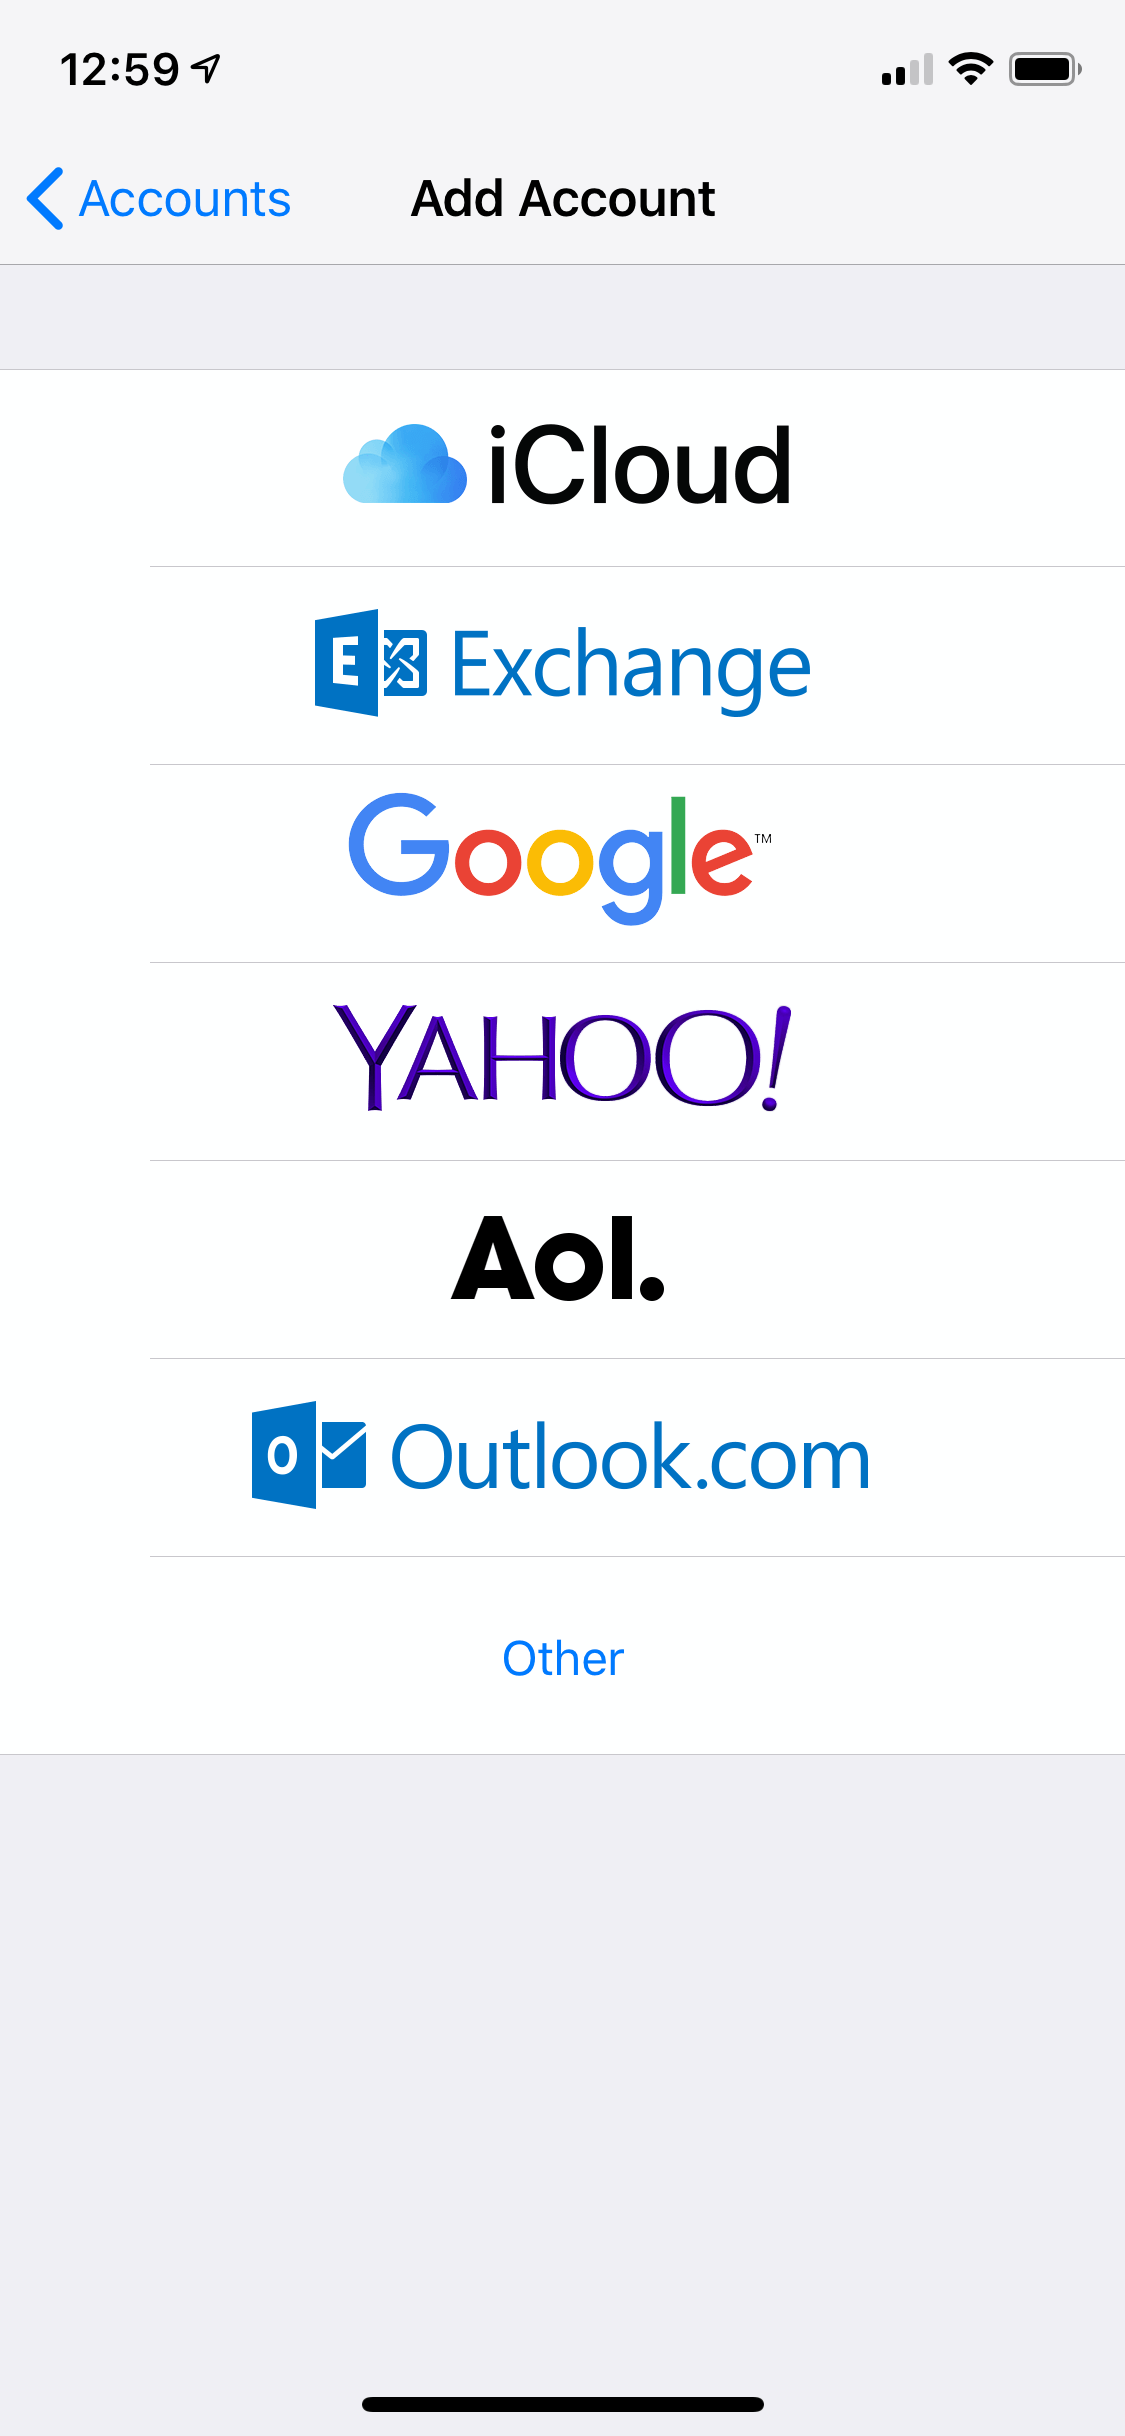
Image: tap ‘Other’ to set up an IMAP or POP account.
Enter the account information
Next, enter your name, email address, email password and a description for the mailbox.
- The name you enter will be shown to people who receive emails from you. Typically, this is your name but you can choose anything you like.
- The description is used to distinguish the email account from any other account you may have set up. You can enter your email address, or anything else that will help you identify the email account.

Image: entering the account information.
Enter the server settings
You can either set up your email account as an IMAP or POP account. We recommend using IMAP, as your email folders will always be synced across all devices you use. However, if you want to use POP you can select the POP tap.

Image: entering the server settings.
The Host Name is the name of the mail server. In the above screenshot we are setting up the email account info@example.net, which is hosted on our Strawberry server. The hostname for that server is strawberry.active-ns.com. Obviously, your email may be hosted on a different server. You can find the server name for your domain in your welcome email or via you hosting control panel.
Verifying the settings
After you tap Next the mail app will verify the settings. If you get an error message, please double-check if the settings you entered are correct. And should you get stuck, please note the error message and contact us – we are more than happy to check the error.

Image: verifying the email settings.

Image: the inbox for our test account.
Featured Blogs
Exploring the Costs Associated With a Website
In the digital age, getting a website is more than just a way to build an online presence, it’s a vital business investment. Not only do large retail businesses need a website, but smaller local businesses can also benefit from taking their business online. Recognising this importance, many businesses are now dedicating significant resources towards …
The Importance of Dedicated Servers for E-Commerce Websites
In the fast-paced world of e-commerce, having a reliable website is an essential factor in success. Whether you also have a brick-and-mortar store or solely a digital shop, ensuring your website is performing at its best can have a direct impact on your bottom line. Factors such as website uptime, ease of navigation and speed …
Things to Consider During a Website Review
Designing a website requires careful consideration and several reviews during the development stages to ensure everything is perfect. Once live, it can be easy to assume that no further updates are needed and your website will continue to perform well, however, this isn’t always the case. Regularly reviewing your website is essential to ensure its …
Why You Should Be Proactive With Server Maintenance
More so than ever before, businesses heavily depend on their websites to improve brand awareness and attract new customers, so the importance of server maintenance shouldn’t be overlooked. Ultimately, the backbone of online business success lies in the reliability and efficiency of servers. For website owners, ensuring the seamless operation of their servers is essential …
Improving the First Impressions of Your Website
In the digital world, first impressions are crucial, especially when it comes to your website. It only takes a few seconds for a visitor to form an opinion about your business based on your website. This short window of time highlights the importance of ensuring your website is not only visually appealing but also fast, …
Signs You Need a New Website Hosting Provider in 2024
As 2024 quickly approaches, it’s an opportune time for businesses to review and evaluate the success of their online presence. The end of the year is perfect to reflect on what has worked, what hasn’t and what changes might be needed moving forward. An essential aspect of this review is your website and, in particular, …
Managed Kubernetes; A Convenient Solution for Businesses
Businesses are continually searching for new ways to streamline their operations and optimise their application deployment processes. Kubernetes, a powerful container orchestration platform, has become the go-to solution for managing containerised applications. Its ability to automate deployment, scaling and management of applications makes it ideal for any business currently running applications on multiple virtual machines …
Ways to Reduce Website Bounce Rates
When reviewing website performance and the success of digital marketing campaigns, there are several important metrics that business owners will compare. One of these metrics is the ‘bounce rate’ and a high bounce rate can be an indication that something isn’t working. Understanding what’s causing visitors to bounce off your website is key to making …
Preparing Your E-Commerce Website for Black Friday
Different times of the year present different challenges for retailers and e-commerce businesses. The lead-up to the holiday season is known for being busy and Black Friday, in particular, is a monumental day where shopping activity reaches a peak. With more businesses now offering Black Friday deals online for a few days or even a …
What is UX and How to Improve Your Website
When trying to reach a wider audience, having a good online presence is crucial. A website can help to increase brand awareness and get more people talking about your products or services. The importance of a website extends beyond brand visibility though, it will become a platform for customer engagement and business transactions. However, simply …
What our clients say
We really rate catalyst2. We get a great response from the team… really happy with the service.